Cheesy Quesadillas (Quick Budget Dinner — 10 Minutes)
Crispy, golden flour tortillas loaded with melted cheese and your choice of fillings. The ultimate 10-minute budget meal — endlessly customisable, perfectly satisfying, and loved by everyone.
The Quick Answer
The signature failure is a browned, even burnt tortilla wrapped around a core of barely-melted cheese, caused by cranking the heat to rush the outside before the inside catches up. Cook over steady medium heat so the cheese passes its melting point as the tortilla crisps, and let the quesadilla rest briefly so the molten cheese sets enough to hold when cut.
Why is my tortilla burnt but the cheese inside still not melted?
The tortilla surface and the cheese centre are heated by completely different mechanisms. The tortilla browns by direct contact conduction with the hot pan and the Maillard reaction, which races ahead on high heat, while the cheese in the middle has to be reached by slower heat conduction through the tortilla and the filling. On high heat the outside hits browning temperature long before enough warmth penetrates to the roughly 55-65C that cheese needs to flow. Medium heat narrows that gap, giving the interior time to reach melting point while the exterior only just turns golden. A lid for the first minute helps too, trapping steam that warms the cheese from above faster than dry pan heat alone.
Why does the cheese ooze out and the quesadilla fall apart when I cut it?
Melted cheese is essentially liquid fat and protein held together only by heat; the moment it melts it has no structure and will run straight out of a cut edge or a flipped fold. Cutting immediately means slicing through that liquid, dragging it out and leaving hollow tortilla. Resting for thirty seconds lets the cheese cool just below its setting point, where the casein proteins re-link into a soft but cohesive mass that acts as glue between the tortilla halves. Overfilling fights this, because a thick cheese layer holds more heat and stays molten longer, which is why a moderate, even layer that reaches the edges sets faster and binds the quesadilla into clean, intact wedges.
Not sure what to cook next? Let the generator pick your next dish in one click.
Random Recipe GeneratorAbout This Recipe
What is this dish?
Quesadillas (pronounced 'keh-sah-dee-yahs', from the Spanish 'queso' meaning cheese) are among the most beloved everyday foods of Mexican and Mexican-American cooking — flour tortillas filled with cheese and cooked in a pan until golden and crispy, with the cheese inside melted into a gloriously gooey interior. In their simplest form they require only tortillas and cheese. At their most complex, they can hold any combination of proteins, vegetables, and seasonings.
Why you'll love it
Quesadillas take 10 minutes, cost under £2 per person, require almost no skill, and produce a result that is genuinely delicious. The technique is simple enough for complete beginners but rewards a few techniques — medium heat, cheese on both sides, resting before slicing — that elevate them from a snack to a proper satisfying meal.
When to serve
Quesadillas are perfect for quick lunches, fast weeknight dinners, casual entertaining, feeding children, or late-night snacking. They work as a starter cut into small triangles, a main course with a salad alongside, or a sharing dish with dips and salsas in the middle of the table.
Quick tips
Grate cheese from a block for the best melt. Layer cheese on both sides of the filling. Use medium heat throughout. Press gently with a spatula during cooking. Rest 30 seconds before slicing.
Ingredient Highlights
Flour Tortillas
Large flour tortillas provide a neutral, slightly chewy wrapper that becomes golden and crispy when pan-fried. The 25cm size is ideal for a half-moon folded quesadilla. Corn tortillas can be used for a more traditional flavour but are smaller and more fragile.
Melting Cheese (Cheddar or Monterey Jack)
The defining filling — the cheese must melt completely into a smooth, stretchy interior. Grating your own from a block is essential for the best melt. Monterey Jack is mild and supremely melty; Cheddar adds flavour but can be slightly oilier.
Black Beans
The most common and best-matching filling alongside cheese — they add plant-based protein, fibre, and a creamy, earthy flavour that complements the melted cheese perfectly. Season with cumin and smoked paprika before adding.
Smoked Paprika and Cumin
The spice combination that gives quesadillas their characteristic Mexican-spiced character. Added to the filling, they season the cheese and vegetables with warmth and smokiness.
Substitution Options
Corn tortillas can replace flour tortillas for a more traditional, gluten-free option. Any good-melting cheese (Gouda, Mozzarella, Gruyère, Emmental) works in place of Cheddar. Refried beans can replace black beans for a more traditional Mexican filling. Vegan cheese alternatives melt with varying success — brands vary significantly in their melt quality.
You'll likely need to buy
Likely in your pantry
Step-by-Step Instructions
Prepare the fillings
Grate the cheese if not pre-grated. Prepare any optional fillings — slice the pepper thinly, drain and rinse the beans, slice the spring onions. If using spices, mix them with a small pinch of salt in a bowl and set aside. Having everything ready before cooking ensures the quesadilla is assembled quickly and the cheese melts evenly before the tortilla over-browns.
Chef's Tips
- ›Grating your own cheese produces significantly better melting results than pre-shredded cheese, which is coated with anti-caking agents that inhibit melting.
- ›Keep all fillings thin and flat so they don't create gaps between the tortilla layers that prevent the cheese from melting evenly.
Assemble the quesadilla
Place a tortilla flat on a work surface. Sprinkle half of the grated cheese evenly over one half of the tortilla, leaving a 1cm border at the edge. Add any fillings on top of the cheese in a thin, even layer. Scatter the remaining cheese on top of the fillings. Fold the bare half of the tortilla over the filled half to create a half-moon shape. Press down gently.
Chef's Tips
- ›Using cheese on both the bottom and top of the fillings acts as edible glue that holds the quesadilla together when it is flipped.
- ›Don't overfill — a thin, even layer of filling produces a flatter quesadilla that cooks more evenly and is easier to flip without spilling.
Cook in a dry or lightly oiled pan
Heat a large non-stick or cast-iron frying pan over medium heat. Add just a tiny drizzle of oil or a small knob of butter and spread to coat. Place the folded quesadilla in the pan. Cook for 2–3 minutes until the bottom tortilla is golden and crispy and the cheese has started to melt. Carefully flip using a wide spatula and cook the second side for 2 minutes until golden.
Chef's Tips
- ›Medium heat, not high heat — too hot and the tortilla burns before the cheese melts.
- ›Press down gently with the spatula during cooking to ensure maximum contact between the tortilla and the pan for even browning.
Rest and slice
Remove from the pan and rest on a board for 30 seconds — this allows the melted cheese to set slightly so the quesadilla holds together when sliced. Cut into 3–4 wedges with a sharp knife or pizza wheel. Serve immediately with sour cream, salsa, or guacamole.
Chef's Tips
- ›The 30-second rest is important — cutting immediately causes all the molten cheese to run out.
- ›A pizza wheel cuts quesadillas more cleanly than a knife, which can drag and pull at the filling.
Chef's Tips
Techniques that separate good from great
Layer cheese on both sides of the filling
The common mistake is putting all the cheese on one side of the filling. When you fold the tortilla and the quesadilla is cooked, the cheese is only on one side of the filling and the other side is dry. Placing cheese on the bottom, adding fillings, then adding more cheese on top of the fillings means the entire inside becomes unified by melted cheese that acts as an adhesive holding everything together.
Start with medium heat, not high
Quesadillas are a classic victim of too-high heat. The tortilla is thin and browns quickly — if the heat is too high, the outside is dark and crispy before the inside cheese has melted. Medium heat gives the tortilla time to colour gradually while the cheese inside heats all the way through to a fully melted, gooey interior. If the tortilla is browning before you can see the cheese melting at the edges, reduce the heat.
Rest 30 seconds before slicing
Slicing a quesadilla immediately after removing from the pan releases all the molten cheese, which pools out onto the board and leaves the inside of the quesadilla dry and less satisfying. A 30-second rest allows the cheese to partially set — it remains molten and stretchy but stays inside the quesadilla when sliced and served.
For extra-crispy quesadillas, use a dry cast-iron pan
A well-seasoned cast-iron pan without any added fat or oil produces the crispiest, most evenly browned tortillas because it maintains heat perfectly and the dry surface maximises contact between the tortilla and the hot pan. Non-stick pans with a tiny amount of oil also work well, but the cast-iron method produces a noticeably superior crunch.
Nutrition Facts
Per serving · Estimated values
* Estimated per serving based on a 2,000 calorie diet.
Equipment Needed
- Large non-stick or cast-iron frying pan (at least 25cm / 10 inch)
- Wide spatula
- Cutting board
- Sharp knife or pizza wheel
- Grater (if grating cheese from a block)
As an Amazon Associate we earn from qualifying purchases — at no extra cost to you.
Quick Tips
- Grate your own cheese from a block — pre-shredded cheese contains anti-caking agents (usually potato starch or cellulose) that significantly reduce meltability. Block cheese melts into a superior, gooier result.
- Medium heat is crucial — high heat produces a crispy tortilla with cold, unmelt cheese inside. The tortilla needs enough time on medium heat for the cheese to melt completely before the outside burns.
- Use cheese on both the bottom and top of any fillings — this creates an edible adhesive layer that holds the quesadilla together when flipped and sliced.
Recipe Variations
Different ways to make this dish your own
Chicken Quesadillas
Fill with 150g of shredded cooked chicken seasoned with cumin, smoked paprika, and garlic powder. Add a tablespoon of salsa inside for moisture. The most popular quesadilla variation in Mexican-American cooking.
Breakfast Quesadilla
Fill with scrambled eggs, diced cooked bacon or sausage, and cheese. Serve with hot sauce for a fast, substantial morning meal.
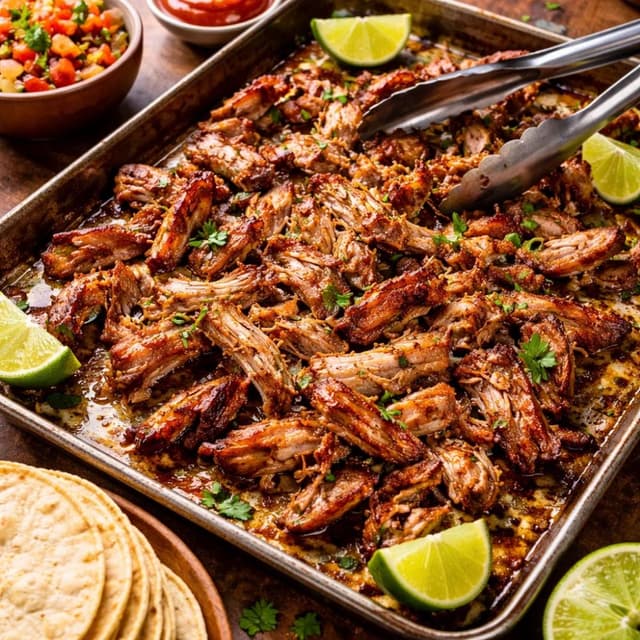
Pulled Pork Quesadillas
Fill with leftover pulled pork or shredded slow-cooked beef, pickled jalapeños, and Cheddar. The sweet, smoky pork with sharp cheese is an exceptional combination.
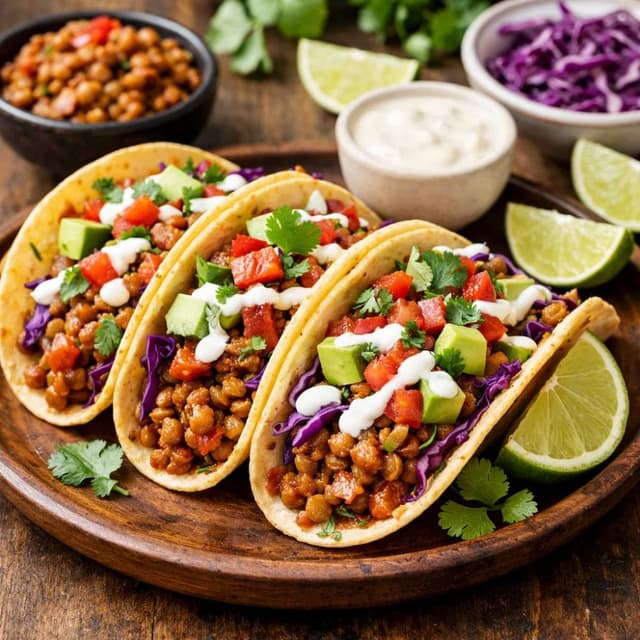
Vegan Black Bean and Sweet Potato Quesadillas
Fill with mashed roasted sweet potato and seasoned black beans. Use vegan cheese or omit altogether — the filling is substantial enough without it. Season generously with cumin, smoked paprika, and lime.
What to Serve With
Perfect pairings to complete the meal
Sour Cream
The classic accompaniment — cool, tangy sour cream contrasts with the hot, crispy quesadilla and provides a creamy richness that complements the cheese and spices.
Fresh Tomato Salsa or Pico de Gallo
The acidity and freshness of chopped tomato salsa cuts through the richness of melted cheese and crispy tortilla, providing a bright, clean counterpoint.
Guacamole
Creamy, fresh avocado guacamole is the third essential accompaniment alongside sour cream and salsa — the avocado fat adds richness and its green freshness balances the warm, heavy quesadilla.
Sliced Pickled Jalapeños
For heat lovers — the vinegary, spicy jalapeño is the perfect flavour contrast to mild, melted cheese.
Storage & Reheating
Keep it fresh and plan ahead
Refrigerator
Store cooked quesadillas wrapped in foil for up to 2 days. The tortilla will soften as it sits.
Freezer
Freeze cooked quesadillas individually wrapped in parchment then foil for up to 2 months. Reheat directly from frozen in a pan.
Make-Ahead
Assemble uncooked quesadillas up to 4 hours ahead, wrap in cling film, and refrigerate. Cook as directed when ready to serve.
Reheating
Reheat in a dry pan over medium heat for 2 minutes per side until the tortilla is crispy again and the cheese is melted. Avoid the microwave — it makes the tortilla soft and rubbery.
Cooking tonight?
Get a month of dinners like this — done for you
30 chef-tested dinners mapped to the month, plus 5 ready-to-shop grocery lists. One-time $8.99 — 30 dinners planned for you, zero nightly decisions.
See the 30-Day Plan →Got Leftovers?
Turn what you already have in your fridge into delicious meals. Our AI-powered generator creates personalized recipes from your ingredients.
Go Deeper
Master the Culinary Science
Every recipe is a doorway. Our 7 Mastery Guides give you the science, technique, and framework to understand why food works — not just how to follow steps.
AI-Powered
Have Ingredients? Generate a Recipe.
Tell our AI what's in your fridge and get a custom recipe with image in seconds. No waste, no boredom.
Try the AI Recipe Generator →Browse more like this:
You Might Also Like
Discover more delicious recipes similar to what you're cooking